
Quick Mill Vetrano 2B Evo - In Depth Review
Some machines I am excited to receive because I have seen in the past and longed to try them out. Others I have been completely oblivious to. Ten plus years ago when I was surfing the internet for various espresso machines, a few heavy hitters were the Alex Izzo, Rocket, Vibiemme, and Quick Mill. They were all similar but all different in their own ways. Honestly looking back, home espresso machines have evolved a ton over the past 10 years. I was always drawn to the lines of the Rocket Giotto and eventually bought as my first machine. The others looked nice but didn't seem me, the Quick Mill included.
Here I am years later fairly content with my Rocket Giotto V3 with PID controller. The Giotto is a HX machine with tank only. The PID was a big deal when I bought it (at least I thought so). My personal day to day is focused on mostly black espresso. I love a rich single origin, or even an amazing blend for espresso. Light roasts with their almost overly acidic complex flavors, down to some of the city roasts getting rich chocolate, fig, and raisin. A milk drink is fantastic as well but not my every day drink of choice. What could a new machine possibly have to offer that I did not already have? I mean, dual boiler? Yeah that's pretty cool. Rotary pump, again pretty cool. Already had a PID.

I received the Quick Mill Vetrano 2B Evo, what a name... Didn't really know what to think as I have tried many espresso machines through the years. My faithful Giotto has been so good to me although I have used better and worse, you just never know where something is going to rate. I threw the Vetrano up on the counter next to the Rocket and said Wow, this thing is nice, honestly I didn't even want to like it. They both have their trade offs from an aesthetics standpoint. The angled panels on the Giotto is what drew me to that machine to begin with, but the Vetrano has its own elegance. In a past life I have done a fair amount of metal working and could really see how the Vetrano had some fairly sophisticated metal working to it although it looks quite simple.

FYI, I found the feet, they were in the drip tray.

A quick initial comparison between the Vetrano (left) and my Rocket Giotto (right).

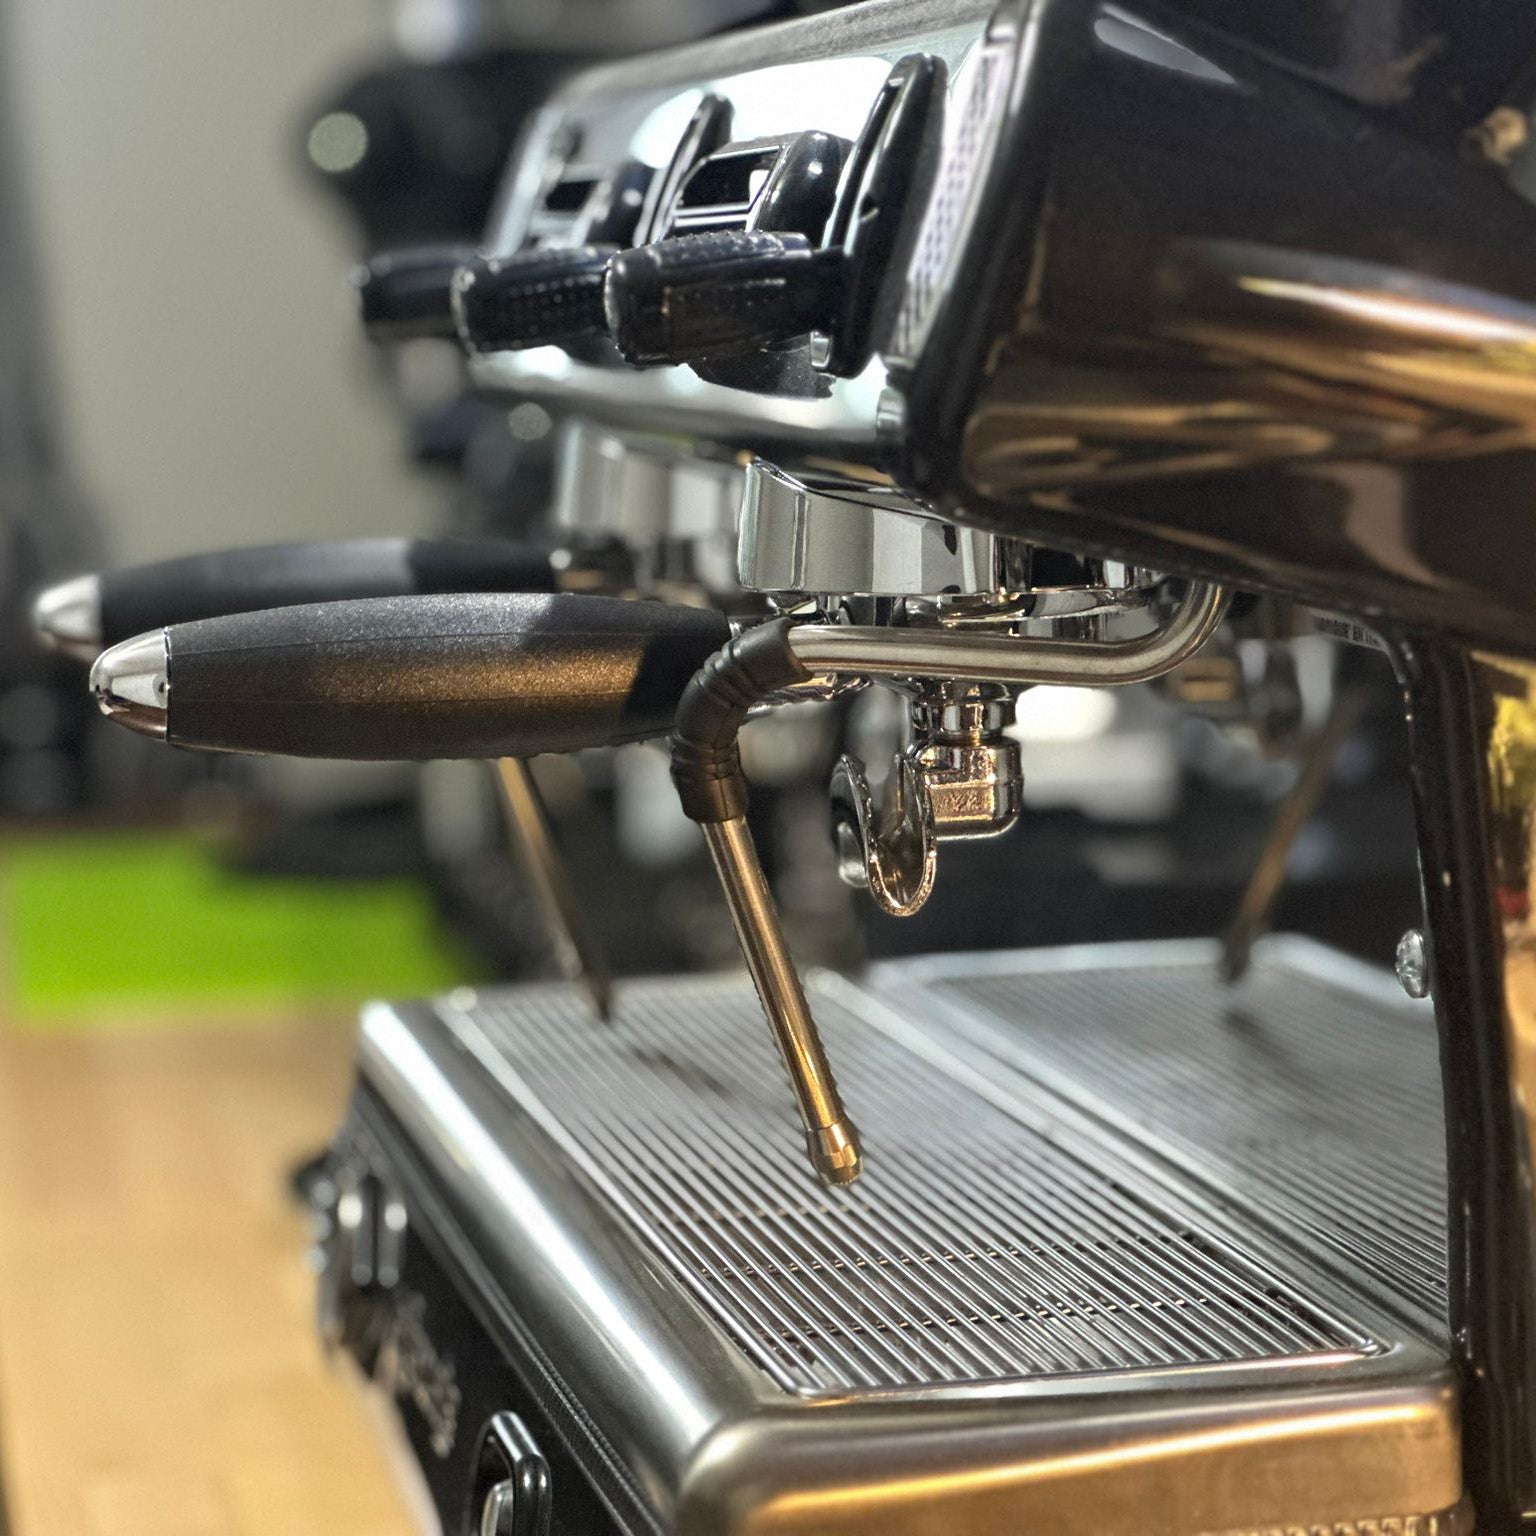
Out of the box, mine had joysticks in place of the typical steam and water knobs. You have the option to have the more traditional knobs if you wish, but mine came with the joysticks which I had never cared for in photos. Truthfully I thought the joysticks looked quite boring until I saw in person. Holy cow these valves are insanely nice! Without the knobs the machine looks understated, but has a very professional high end 'less is more' appearance. This machine also came with the optional flow control device which adds $225. Mine came with the flow control device as well as the steam and water joystick preinstalled. If the joysticks still aren't your thing, you can opt for the more typical knobs, but I think I am an convert to these joystick style valves.

These valves build quality just seems above and beyond. They are amazing.

Vetrano Controls.mov from Barrett on Vimeo.
Seemingly more popular now days, manufacturers are making their machines rated for both 15 or 20 amps. It costs them little to nothing but can give a lot of flexibility to the owner. When purchasing, they give an option to have the seller set the machine up for either 15 or 20 amps, mine came with standard 15 amp setup, and I am glad because I wanted to use it with my Wemo smart outlet. I might be short changing myself though. With the 20 amp setup the machines dual boilers can heat simultaneously whereas with the 15 amp setup it alternates heating the steam and the brew boiler one at a time. Don't fret because the PID controller does amazing work of this by switching from one boiler to the other fairly quickly. If you buy the machine and 15 amp or 20 amp and decide that is not going to work for you, again, not a problem because it is just a matter of a few setting changes. I won't go into that here, but there are some instructions to change this setting quite easily!

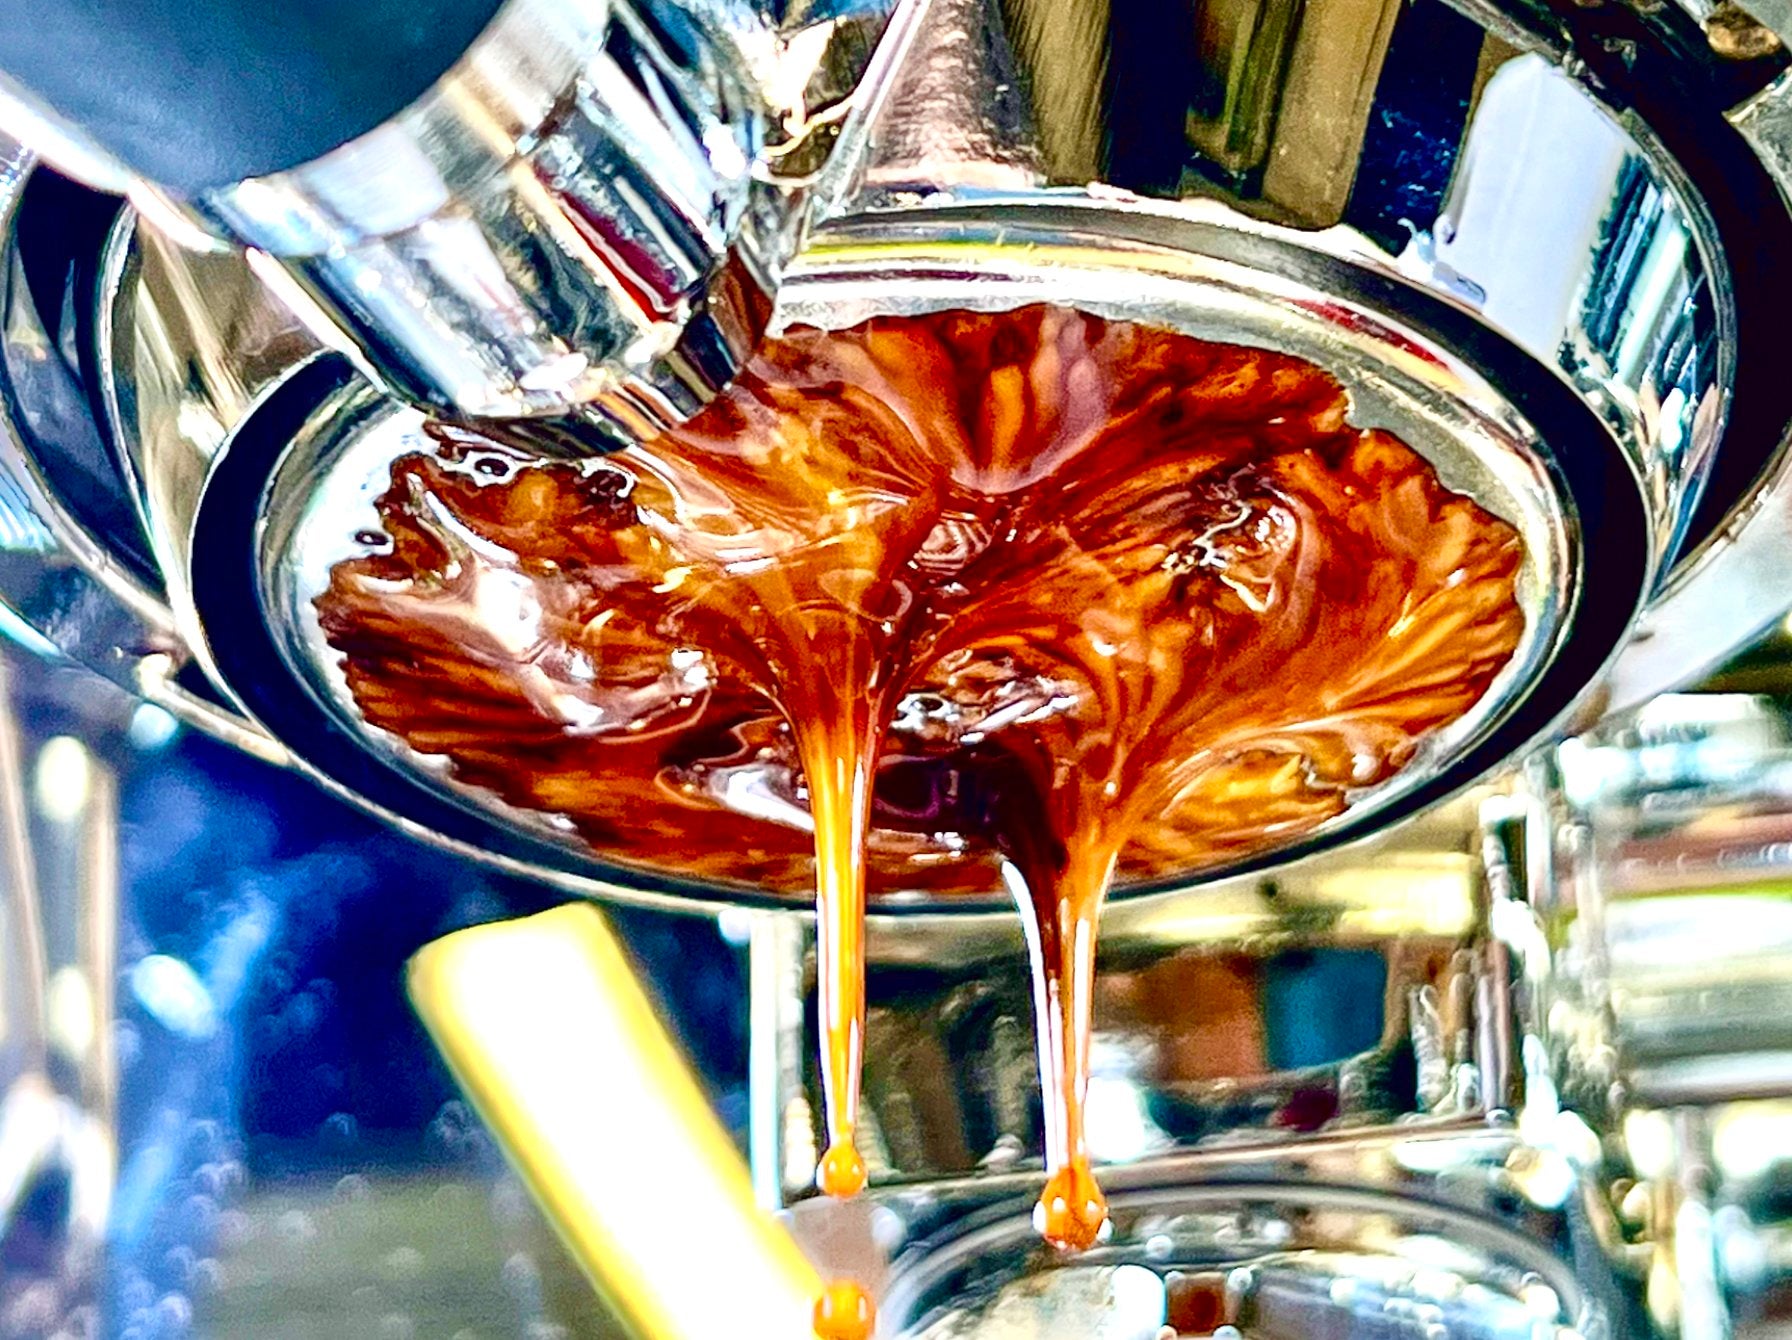
The next morning, I prepped my typical 18g dose in a bottomless portafilter. I did not use the portafilters that came with the machine as I am partial to my bottomless with VST baskets most of the time. Time to see what this thing can do! For now the flow control valve was wide open, and I brewed my first shot. WOW! So smooth all around. The rotary pump was so quiet in my kitchen. It almost felt weird because I am not used to it being that quiet, I feel like this machine is extra quiet. Maybe its just me. The shot itself was great too!
Vetrano Pulling Shot.mov from Barrett on Vimeo.
Again, I didn't choose this machine, but it is slowly choosing me. I did zero research on the machine prior to receiving. I noticed the side panels had some grooves in the front which also seemed to have plastic behind them. I thought "what a missed opportunity to put some LED lights behind these panels". I went to google to look at this machine and noticed that the strips were actually lit up in photos. What? So I started poking around and discovered on the bottom of the machine there are two small rocker switches. After flipping one of the switches the white LED strip lights installed inside the machine came to life. Not going to lie, I was in shock... I had no idea this machine had lights inside of it. I just stood there staring at how good it looked. I could see the lights being a pro/con to some people. The older Vetrano used blue lights which some people did not like. The newer one uses white lights and looks really sharp in my opinion. I could see a lot of people thinking the lights are a bit too flashy and either keep them turned off, or even be opposed to having the lights at all. I say, if you don't like the lights, they turn off very easy.

The switches are hidden on the underside of the machine. One is for the lights, and one is to switch between reservoir and direct plumb.

By this point, I was really liking the Quick Mill. From the tiny thumbnail photo on websites it just doesn't look like much, but every time passing in my kitchen I think "wow that is good looking". Time to start experimenting with what else this machine has to offer. The easiest, even though not standard feature is the flow control device. The price adder seems pretty steep, but mine came pre installed. It is not a true pressure profile machine, but I started playing around with the valve and doing some research. I discovered that by turning all the way down you can do a very nice pre infusion followed by full pressure and subtly tapering off. I was totally hooked. The flow control kit won't leave you guessing about what your flow control valve is actually doing. A matching gauge screws onto your grouphead allowing you to view the rise and drop in pressure as you use the valve.

I am fairly partial to having two gauges, but Quick mill combines two gauges into one. This gauge really pops in person, the numbering looks great, and the subtle dark blue just looks very good and high end. With the pressure gauge on the group head, I definitely do not find myself looking at this gauge much anymore.

What else does this machine have to offer? Well, it is capable of using a water reservoir or being direct plumbed to a water supply line. My Giotto is a reservoir only machine. The reservoir machines are really nice, you can put them anywhere in your kitchen and not worry about a water supply, or even a room such as an office, etc. No complicated plumbing required. They are a turn key machine. Fill them up and make espresso. A plumbed machine is quite the opposite, you are tethered to a water supply. Fantastic for coffee shops but that might not be great for everyone. The Vetrano as well as many other brands/models are designing their machines to operate from either a reservoir or a water line. Very convenient! If you do not have your water supply ready on day one, you can still use the machine. If you move to a new home, you do not have to worry about having a water supply on day one of moving in. For me, I did not have a water supply (yet) so I decided to use the reservoir to start with. One more thing about the reservoir, they use a magnetic sensor to detect low water levels. I prefer this over the types which use the water to connect a circuit. When the water gets low the circuit breaks. The main issue with that is if your water is too pure sometimes it does not conduct electricity. The magnetic sensor is very handy as it doesn't care what water you put in it, although you should care!


I thought it was kind of odd, yet I really like this feature. Most reservoir machines, the lid to the reservoir is removed and set aside. With the Vetrano the lid is actually hinged. So you can flip it open. It sounds dumb, but I love this.


Another thing I thought was kind of odd is the top of the machine lifts off quite easily. There are no screws holding it down. It makes wiping down the top of the drip tray very easy! The drip tray is a different design than I am used to because there are no traditional rails. The sides of the machine are the rails, with no rail in the front. I actually love the design, it looks great and functions great. The top of the machine has a ton of room for cups too, much more than I am used to.


It also comes with a plumbing kit. You can see the swivel connection below. The swivel connection is very nice when you push and pull the machine on your counter. The steel braided line is very nice and mine came with a shark bite fitting to fit to a water line or water softener. Right behind this fitting is a small valve to allow the water line to fill the machine.

An option I have not installed yet is the drain line. The drip tray has a plug which can be removed and the tray will drain directly into a sewer line if you choose to do so.

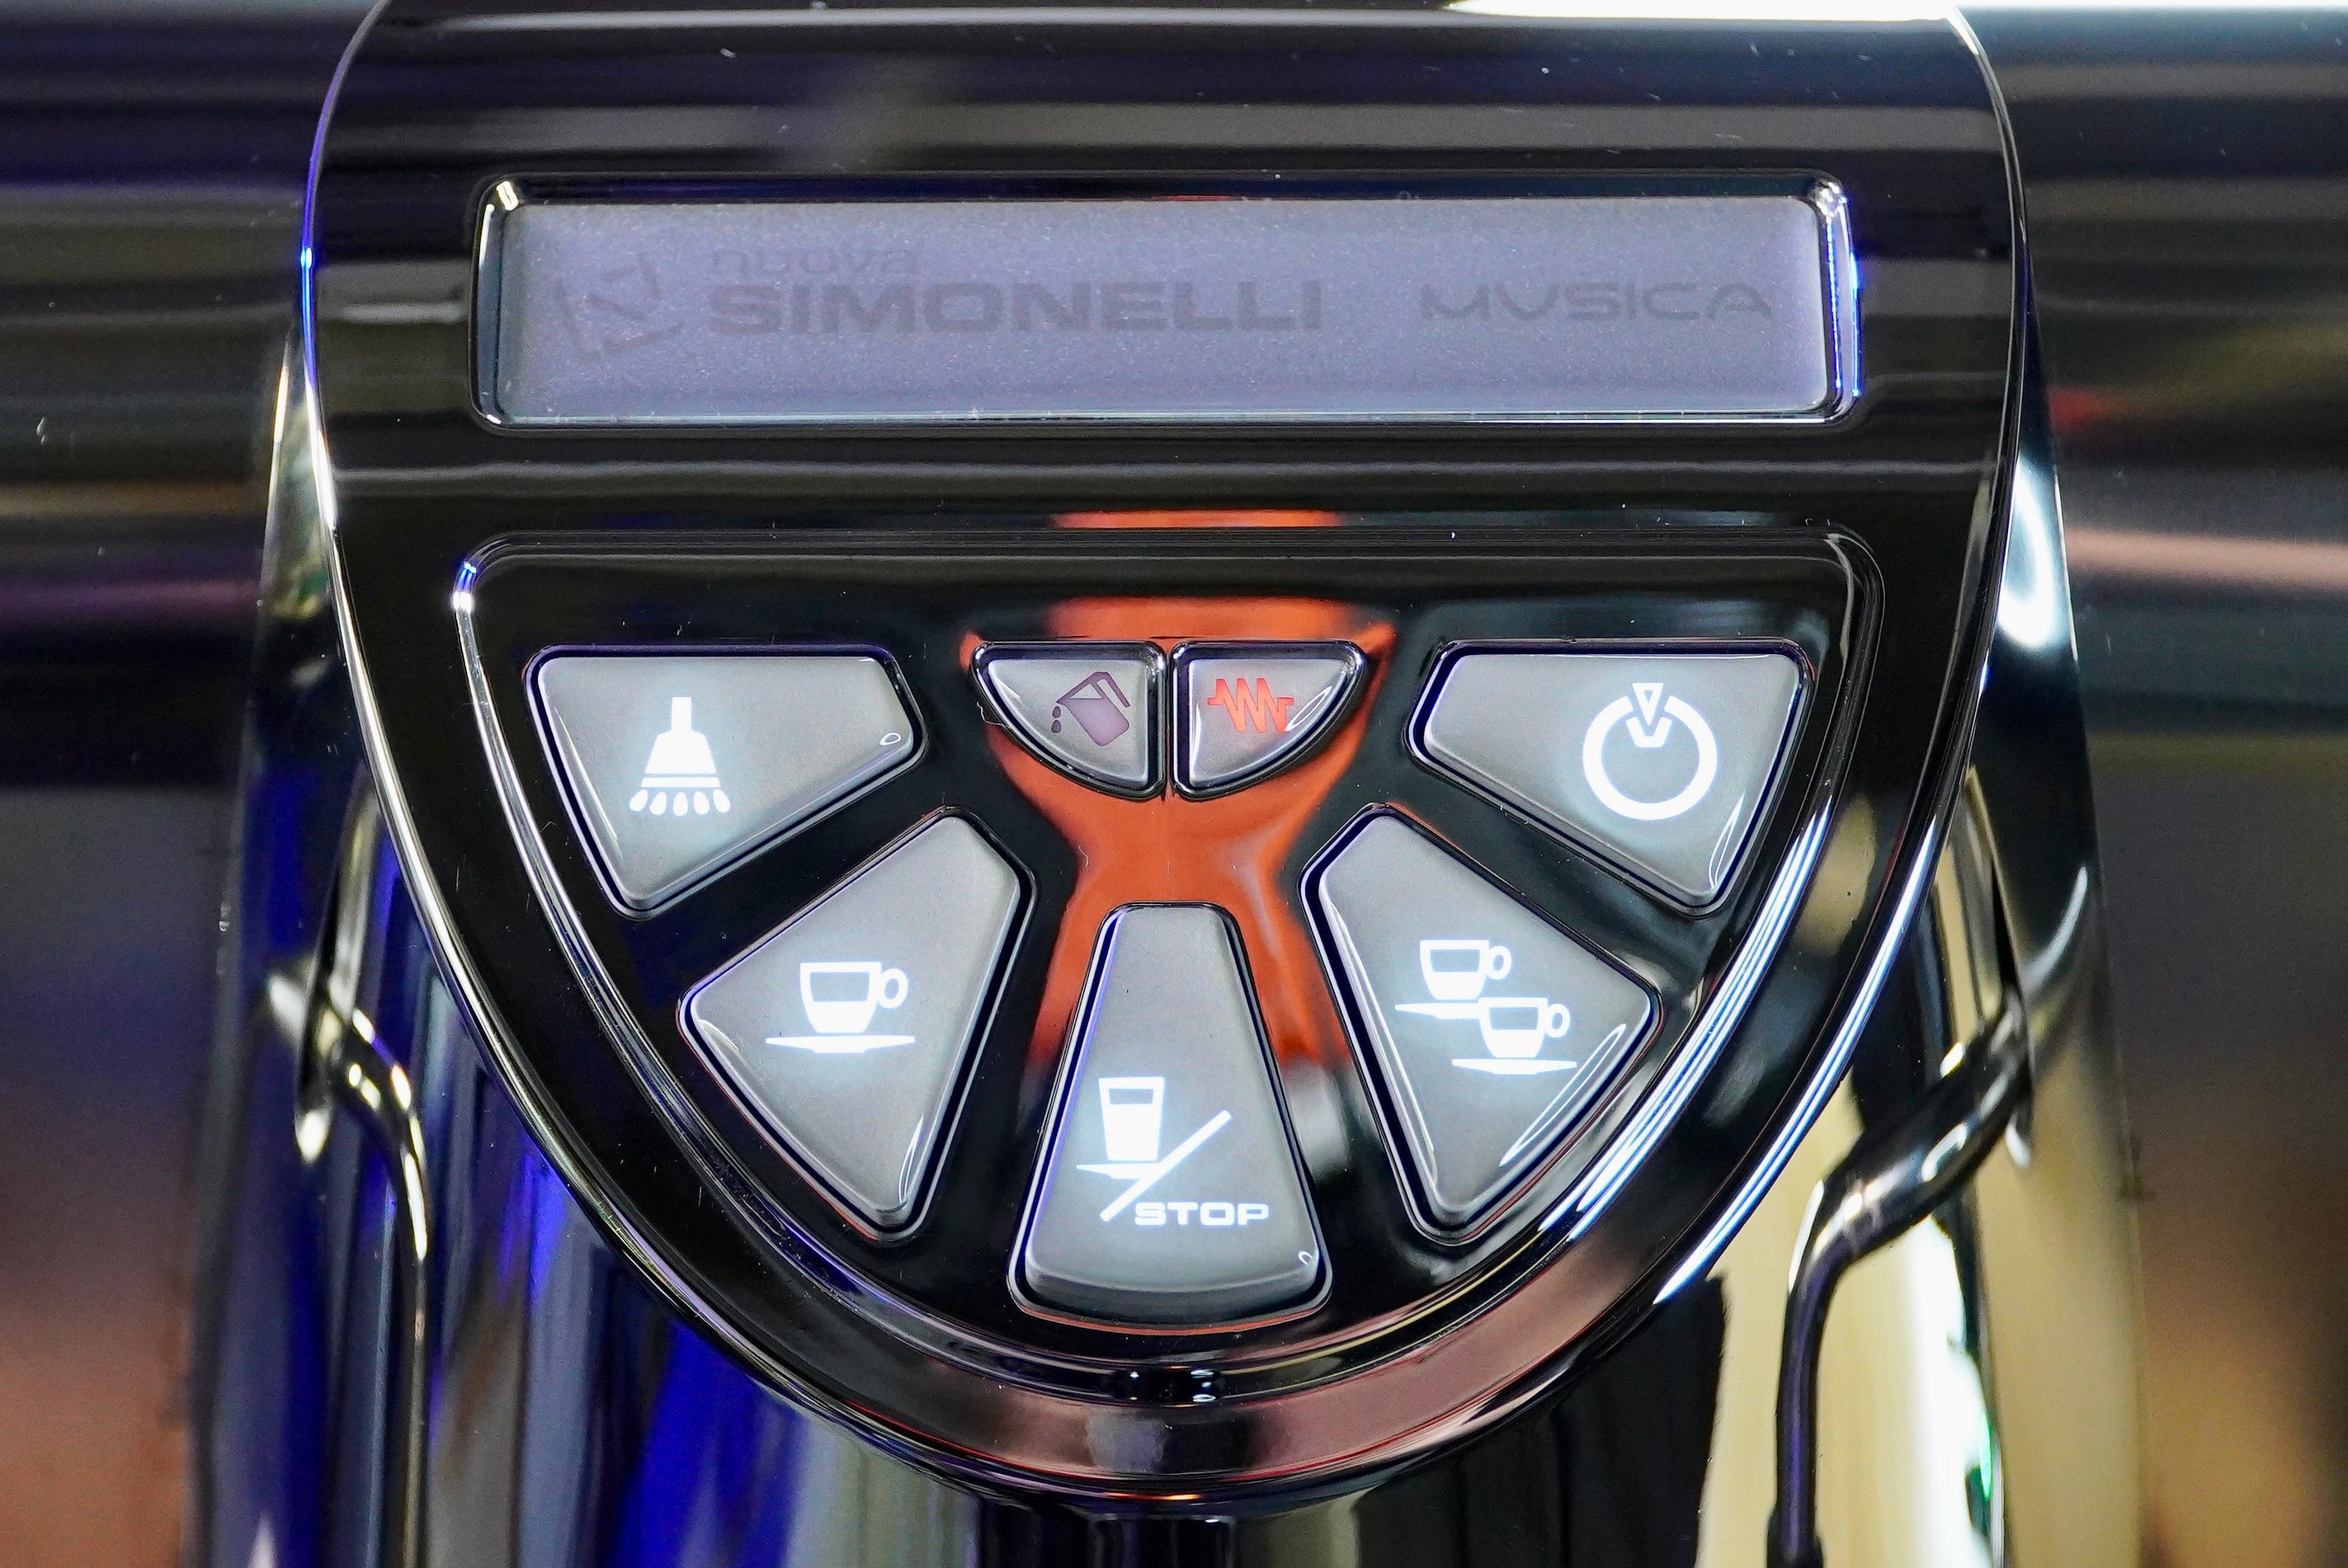
In the past I have always made a big deal about machines with a PID controller. I am here to make a big deal about this machines PID controller yet again. They are becoming common place in the home espresso machine world. For those not familiar with what a PID controller is, you can think of it like somewhat of a thermostat for your machine. When you set your boiler at a specific temperature, it turns the element on when the boiler begins to cool, and turns the element off when the boiler begins to get too hot. It usually keeps the boiler at a much more stable temperature as compared to a pressurestat. How does a pressurestat work? In a way the same but it is more old school. Instead of using a temperature sensor, it operates off boiler pressure. When the pressure goes up, the element turns off, when the pressure drops, it turns back on. It has worked great for decades, but the temperature swing is much more dramatic. Also, the pressure stats have always been prone to being less reliable over time. The Vetrano uses a very nice PID setup, the controller is used to control the temperatures for both boilers. The latest version of the Vetrano has the PID controller completely recessed inside of the machine. Looking at some of the older models they had a couple different designs where the PID module was more prominent. This design is far more elegant.

A feature I have used on other machines but did not have on my Giotto is a shot timer. As soon as you begin to pull a shot, the PID controller display stops displaying the boiler temperature and starts a shot counter. For a standard 1:2 shot, we use 18g of coffee, with 36g espresso output. We want to pull the shot within about 30 seconds usually. I had always done a gut feeling on shot time, but it is really nice having it right in front of you and being able to repeat or modifying as required. To me its one of those things that you don't know you really want, but once you have, you don't want to give it up. Not only will you enjoy it, its going to help improve your shot.
Vetrano PID and Shot Counter from Barrett on Vimeo.
The Vetrano is a dual boiler machine meaning that it has separate boilers for the brew water and the steam. If for any reason you do not need to use your steam boiler, there is a switch below the power switch to leave it turned off. If you are only wanting to brew straight espresso there is not any reason to heat the steam boiler up. Speaking of heating boilers, when you first flip on the machine it will heat your brew boiler first followed by the steam as soon as the brew boiler is up to temp. So if you think your steam boiler isn't heating up, it might just need a few more minutes.

When I received this machine I had no intention in wanting to keep it. There are so many great machines out there, and I knew when it came time to upgrade I would probably spend a ton of time researching what seemed the best for me. Within a few days, I said it didn't matter, I loved using this machine. The shot quality was superb when paired with my Atom 75. The machine was so quiet with its rotary pump which can also be plumbed to a water supply. The design in a way didn't look quite as flashy, and I never really liked the machine in photos, but in person it looks amazing. Going into this blind, I pulled up the stats on two very popular machines. One is the Rocket R58 and the other the Alex Duetto. All three machines have an amazing build quality and for the most part similarly priced. Each features the classic E61 group head, polished stainless steel bodies, rotary pumps and ability to plumb. There are some subtle differences though. The Vetrano features an all stainless steel boiler, which is usually only seen in very nice commercial machines. The Alex Duetto and the Vetrano both have a 3L water reservoirs where the R58 has a 2.5L. The Quick Mil and the Alex have similarly sized boilers, the R58 is slightly smaller. The fully tricked out Vetrano costs about the same as the R58 with seemingly better options. I am a huge fan of Rocket, always have been and always will be. I figured I would end up with an R58, but I am afraid for now, this Vetrano is going to grace my kitchen for many years to come.


Who is this machine for:
- The serious home espresso machine owner. This is one of the best machines within this price range if not the best.
- Ability to plumb water and drain for a more serious installation.
- Someone that wants a high end dual boiler. You can pull a shot and steam milk simultaneously.
Pros:
- Great value, especially when comparing against several similarly rated machines.
- Dual boiler machine with stainless steel boilers
- Rotary pump, plumbable.
- Easily swap between water reservoir or plumbable
- The drip tray is huge! No need to dump all the time. The drain kit is included so you can easily connect to a drain or a bucket.
- Option for Joysticks or knobs for steam and water valves
- Set up to use 15 or 20 amps making it a powerhouse when 20 amps is available, and adaptable when only 15 amps is available.
- PID controller for both brew boiler and steam boiler. Latest version of the PID display is very elegant.
- The PID display doubles as a shot timer.
- The water reservoir lid is hinged
- The feet are nice and tall, I like this so that I can clean under my machine without moving it.
- The plumbed connection is a swivel connection allowing the line to move freely when pulling it out for cleaning
- It looks fantastic in a less is more kind of way! I love how the sides have lights in them. It gives this machine a pop that others don't have.
- The setup came with a fairly nice tamper
Cons:
- I didn't like the stock portafilters that came with the machine. They function okay but are nothing special, especially for such a nice machine.
- The lights can be a bit annoying depending on the angle. The top vents and the seams in the front body panels allow the light to shine through. Depending on the angle an LED might shine in your eye.
- The body panels on my machine needed some adjustment. The stainless they use is quite thick, but I could tell some of the pieces were not formed the best which lead to some minor fitment issues. Most people probably would not notice.
- When connecting the plumbed water line, it was difficult to spin the nut under the machine. The connection to the machine is a swivel connection which is very nice, but the swivel mount is located very close to the power cord which was annoying when connecting the water supply.
- If you plan to plumb the machine, it might require a plumber if you are not the handy sort. This could come as an added expense. My machine came in two boxes which might be intimidating. Still know that you can pull the machine from the box and run it using the water reservoir. Not everything needs to be in place prior to use.
- Related to plumbing the machine, prior to plumbing use water hardness test strips to ensure the water is soft enough to not damage the boilers with scale. Added expense of a water softener as well as the installation of the water softener unit. A dedicated unit for an espresso machine can be had for as little as $100.
For more information visit Espresso outlet. Priced at about $2800, you are getting a lot of high end materials and features. Quick Mill Vetrano Evo 2B


If you are curious what is inside your machine, take a look below. I love this part!
Vetrano Internal Components from Barrett on Vimeo.

The large boiler is insulated, this boiler is your steam boiler.

You can see the rotary pump motor and capacitor. The brass pump is at the bottom.

Tucked between the motor and the steam boiler is the brew boiler.

A side shot of the Vetrano

Some top views of the Vetrano

To the left, the black plastic covers the PID controller circuit board. I am glad it is mounted high in the machine. To the right are all the lights and switches wiring.

A close up look of the motor and capacitor.

The side panel removed. They have some additional insulation which presses against the motor, this keeps everything nice and quiet. The LED light strip is taped to the inside of the panel with some very strong tape!